For the past couple of years, I have been crafting custom gift tags. They have been an easy DIY using blank gift tags and Washi tape. This year I went a little crazy on the gift tags, creating multiple versions and different color schemes.
[spacer height=”16px”]It all started with the idea that I want to up the luxe factor of the tags by adding metal eyelets. A couple of trips to the craft store and Amazon purchases later, I had created families of gift tags. They are easy to create. And it’s a way to get gift tags in the color scheme of your wrapping paper and ribbon.
[spacer height=”16px”]Follow along below to learn how to create gift tags in the Black + Gold Collection.
This page may contain affiliate links, which means if you make a purchase by clicking on any of my links, I may get paid a small commission at NO extra cost to you. I only recommend brands and items that I use and trust. To learn more read my disclosure policy here.
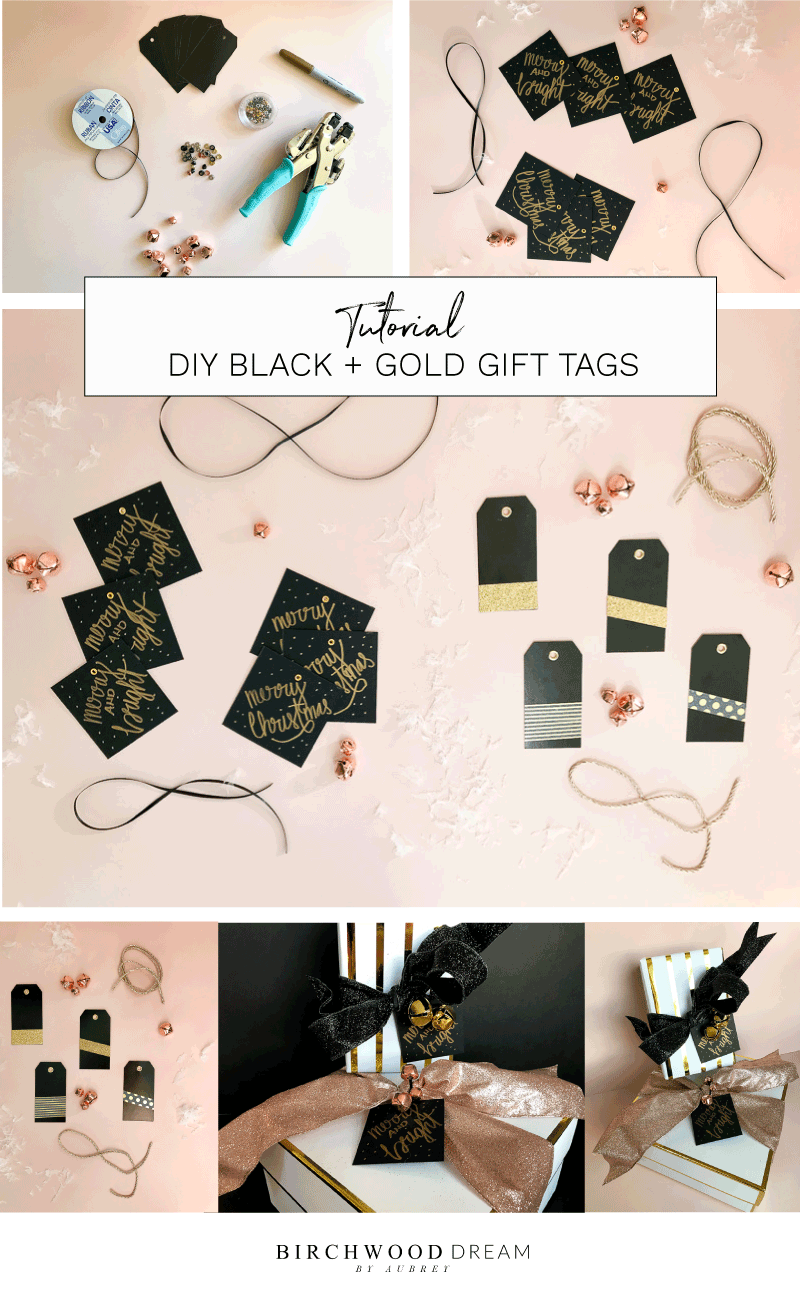
OTHER GIFT TAG TUTORIALS:
SUPPLY LIST
Gather the following supplies.
- Gold Fine Tip Sharpie Markers (not shown)
- Crop-A-Dile
- 1/8″ Eyelets
- 3/16″ Eyelets
- Black Gift Tags
- 2″ x 2″ Black Cardstock Tags (not shown)
- Rose Gold Jingle Bells – Purchased at JOANN. Get them in two different sizes.
- Large Jingle Bells (not shown) – Sugar Paper from Target available during the holiday season.
- Small Black Satin Ribbon – Purchased at Michael’s.
- Gold Washi Tape (not shown)
COLLECTION 1 | GOLD GLITTER TAGS
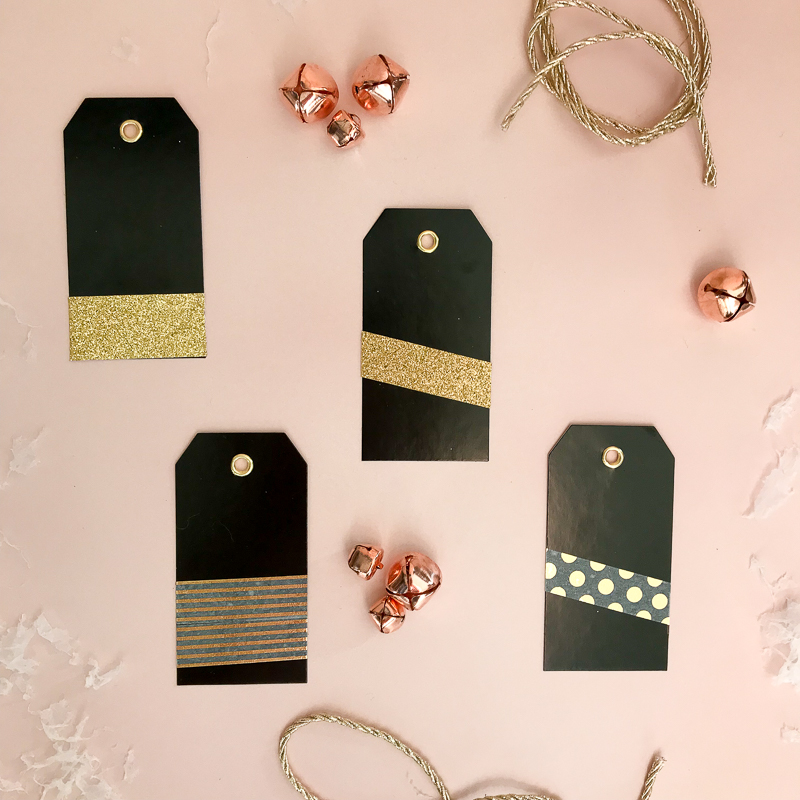
Add 3/16″ gold eyelets to the Black Gift Tags following the instructions with the Crop-A-Dile. Add one or more strips of gold glitter and gold Washi tape to the front of the tag. Have fun playing around with the orientation of the Washi tape. Tie to package with black satin ribbon and gold or rose gold jingle bells!
[spacer height=”16px”]That’s it, see I told you they are a simple DIY.
COLLECTION 2 | BRONZE ORNATE TAGS
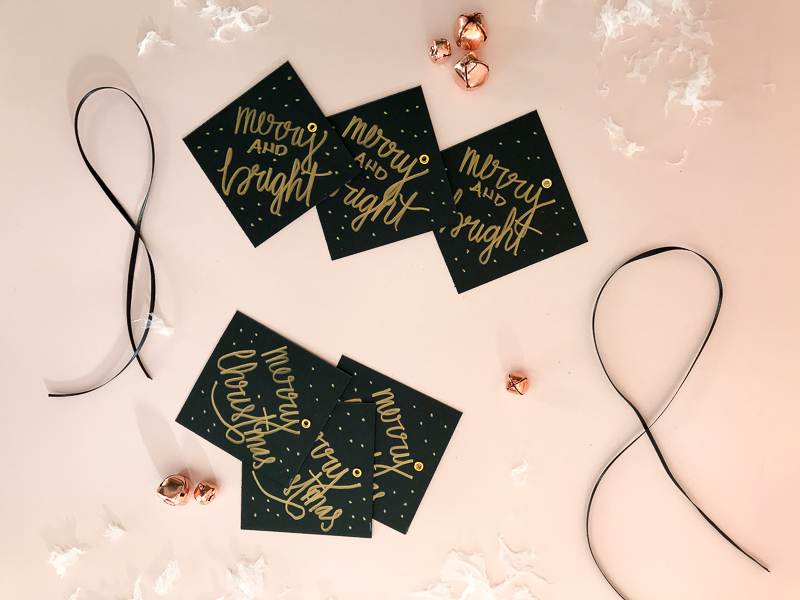
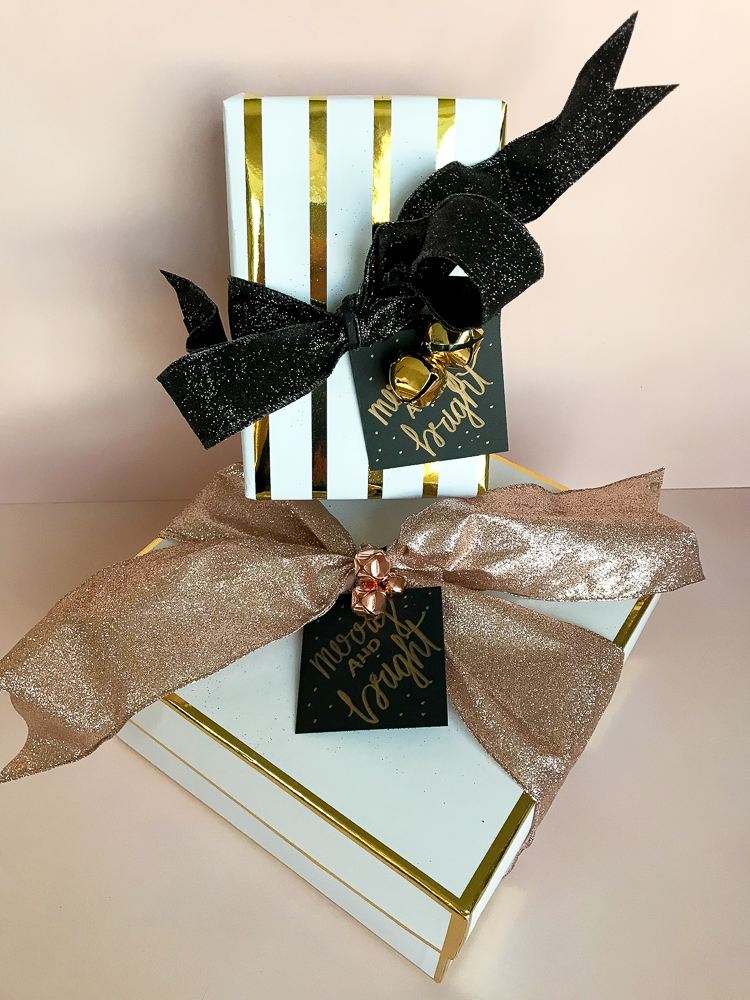
I couldn’t find 2″ square black cardstock anywhere. So I created my own by cutting down 100 lb black cardstock into 2″ x 2″ squares. Create a 1/8″ hole into your tag using the Crop-A-Dile punch. Then add a 1/8″ gold eyelet following the instructions included in the Crop-A-Dile punch to finish the hole. Using a Gold Fine Tip Sharpie Marker and wrote Merry Christmas and Merry and Bright onto the card mimicking the look of hand lettering.
[spacer height=”16px”]I found a hand lettering image that I liked on Pinterest of the text and tried my best to copy it. It’s fun because every tag is unique. Add a few bronze dots to the tag. Tie to package with black satin ribbon and rose gold or gold jingle bells!
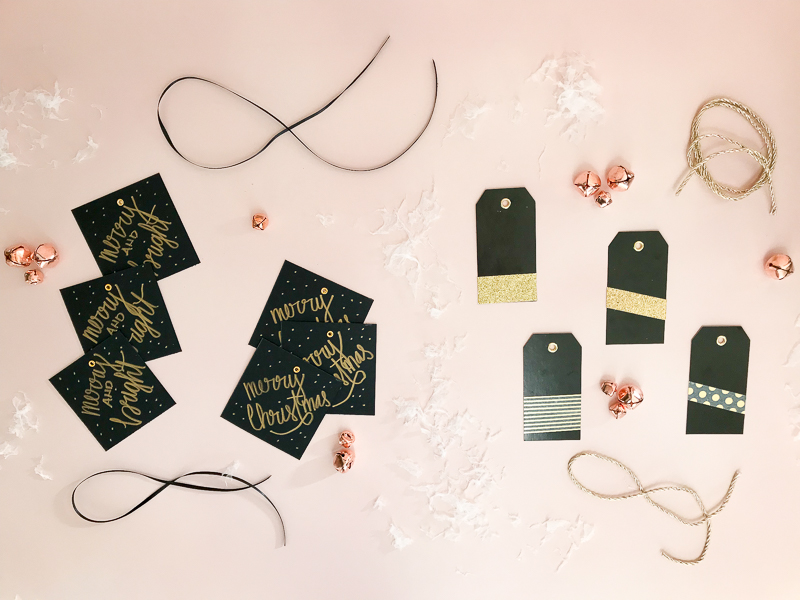
The entire black + gold family.
Here are the tags in use on wrapped gifts.
What are your thoughts? Are you inspired to create some gift tags?



Leave a Reply